
HOW TO: Fit your canopy glass
- ronel115
- Aug 2, 2024
- 3 min read
Updated: Dec 19, 2024
Fitting new canopy and caravan windows can be a moderately complex task that requires some DIY skill and tools. Here's a general overview of the process involved in canopy window fitment. Keep in mind that the specific steps may vary based on the type of canopy and rubber you're working with, so it's important to refer to the manufacturer's instructions whenever available.
New Canopy Window Fitment - Rubber Mount Type Windows
Gather your tools and materials
Before diving into the installation, make sure you have everything you need:
· Your window
· Glazing Rubber 4mm and the locking strip.
· Locking strip Tool
· Sharp point screwdriver
· Grinder (If installing a new window)
A glazing tool is required to fit the glass or frame with the rubber onto your canopy or camper panel.
Steps on how to fit your rubber-mounted canopy window:
1. Measure and Choose your Window: Before purchasing a new window, measure the opening carefully to ensure you select the right size. Use a measuring tape to check the width and height of the window opening. Additionally, consider the type of window you want (fixed, sliding, etc.) based on your needs and preferences.

2. Cut the panel: If you are installing a new window and not replacing an old one, carefully position the new window on your desired panel and align it properly.
Step 1: Trace the window carefully around its shape with a marker.
Step 2: Now add 7mm all around the shape of the glass on the outside.
Step 3: Use a grinder and cut your canopy side panel along the second line.

3. Position the Window: Place the glazing rubber around the edges of the cut-out and then carefully position the new window into the opening of the rubber opening. Make sure it’s aligned properly and fits snugly.
4. Seal the Edges: Use a locking tool to pull the rubber locking strip through the glazing rubber. This seals the window in. Watch the video below for step by step instructions.
5. Check: Check that the window is securely in place and that the rubber is properly installed. Check the window for leaks by spraying water around the edges or waiting for a rainstorm. If you notice any leaks, apply sealant as necessary.
Always keep safety in mind while working on your caravan or canopy. If you're not confident in your DIY skills, it might be a good idea to seek assistance from a professional or experienced individual.
Sliding Window Installation Tips:
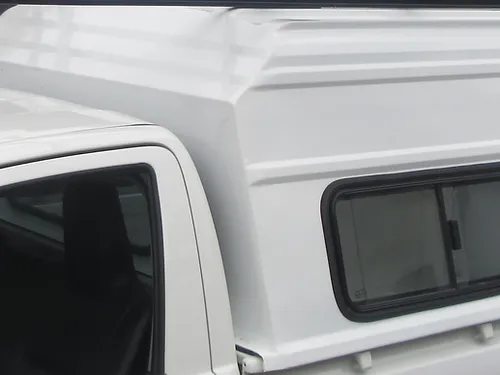
The canopy sliding windows are available in a Left- and Right-Hand side variation. They differ based on the direction in which they open and the positioning of their sliding mechanism.
The Left hand side is positioned at the passenger side and the Right hand side is positioned at the driver's side.

Always remember that the draining holes should be at the bottom and on the outside of the canopy. Check to see if the window catch - the clip to open the sliding window is on the inside of the camper or canopy.

The draining holes are strategically placed to drain any water out of your window when raining. At the same time, it prevents airflow into your canopy.
Pro Tip: Inspect your caravan windows regularly for any signs of wear or damage. Proper maintenance can extend the lifespan of your windows and keep your caravan in top shape.
The windows that we offer at Trasiki Camping Accessories are SABS Approved and made from Toughened Glass as per requirement from the National Road Traffic Act 93 of 1996.
Toughened Glass or tempered glass is a safety glass that is manufactured by using a thermal process to make it more durable unlike any other glass that can shatter or break easily. This prevents injuries and or death in case of a breakage.
Follow this step-by-step video for more instructions
Plant-On Windows
Use Sicaflex to seal your window onto the panel. Make sure to use enough to create a barrier.
Reinforce the frame with pop-rivets on all corners to secure the window.
By following these steps and tips, you can ensure that your new caravan windows are installed correctly and provide you with years of enjoyment. Happy camping!
To view our comprehensive range of window sizes and variations, please visit:
Feel free to reach out if you have any questions or need more detailed guidance.


Comments